First step: fitting the three pieces that comprise the boat's bottom.
Its the handsaw method, called suriawase, which I have described before.
In the interest of time I decided to adopt Murakami's method. Rather than chiseling traditional, trapezoidal mortises for the nails, he drills a hole just under half the thickness of the planking.
I did a full-size layout to get an idea of the curve I would need in my nails. That piece of wood is not the thickness of the bottom. A faint horizontal line represents the bottom. The nail passes through the center of the edge at the seam.
I then chisel from the edge back to the base of the mortise.
Its a pretty steep angle, actually steeper than this looks in the photo.
I then pounded the edges, a method called kigoroshi, or literally "killing the wood."
My Tokyo teacher would make a series of shallow saw cuts through knots to weaken them.
The idea of kigoroshi is to depress the center of the edge. When the planks are clamped and nailed together the unsupported corners get crushed, while the center fibers bounce back, getting an even tighter fit.
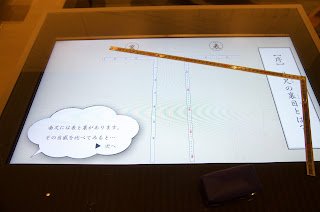
An interlude in the museum, where they have a neat display that teaches you how to do layout with the square. You can use the square and actually write on the screen.
The ink line collection.
My favorite is this fish ink line. Makes me think I need to make one that looks like a boat.
The cutout here is shaped like a heart, but in Japan this is the representation of the eyes of a boar (enomee) which supposedly protects buildings from fire.
The museum employs a temple carpenter named Kitamura san. This is his sharpening station.
And this is his prize stone, cut from a mountain in Kyoto. The ends are painted because water seeping inside can crack the stone. He said he paid 200,000 yen for it, about $1,860 USD.
And lo and behold he had several natural stones.
The nails alternate from the center out and the side in. They are inside the boat aft and outside the boat forward. Murakami is the only boatbuilder I know who alternates his nails like this.
You get an idea here of the amount of curve needed in the nails.
I straightened the ends because the pilot holes in the adjoining plank were plumb.
So in the end this method created some problems, because basically the drilled mortise just didn't allow enough room for the head, and I had in some cases to go back and cut an additional sloped mortise to give me a place to put the nail set to finish driving the nails. It may be a time saver for Murakami, but he's got more experience in nailing this way. I would have been better off with the traditional long mortise... Live and learn. A very nice visitor from Sydney, an Iranian via Canada, jumped in and helped as I frantically worked to get the nails set before the glue dried.
Three out of thirty-one nails had their tips come through the planks. I chiseled a mortise around them and drove the tips down below the surface. My next blog post will be about using an open fire to bend this bottom plank (about two inches thick) at the stern.


Hi!
ReplyDeleteI was wondering your progress of handmade boat in Takenaka museum that why I checked your HP. When is the boat going to finished? I am excited to seeing the shape!
Sincerely
Yoshii
P.S
Do you remember visitor with red coat at museum last week? I am looking forward to seeing the final shape of boat! Take care!
Dear Yoshii,
ReplyDeleteWe have a launching schedule in Kobe Harbor for Saturday, May 7th. You can always come back to the museum and take a look at the progress, or keep watching my blog. There is also the museum's Facebook page. The museum is closed on Mondays and I have Tuesday holiday as well.
Douglas
Dear Douglas san
ReplyDeleteThanks for the detail schedule.
It is first time to learn how to make the boat by hand, so I am going to check your blog continuously!